


Using OpenCV to Detect Spicy V.S. Regular Chicken Nuggets pt. 1
Originally Posted: Nov. 5, 2022
Last Edited: Nov. 5, 2022 - 12:38 AM EST
Author: Mr. Siefen
Code Repo: https://github.com/mrSiefen/OpenCVNuggets
What is OpenCV?
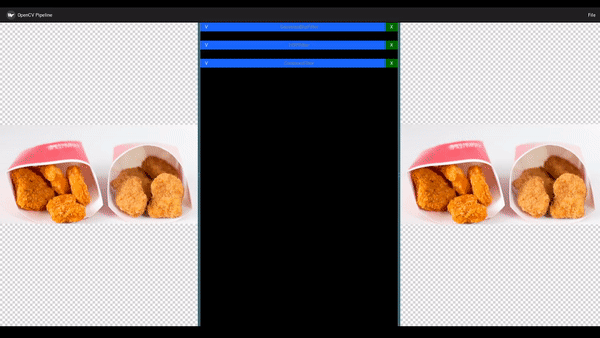
OpenCV (Open Computer Vision) was created to help accelerate the development time of vision processing. It was started at Intel in 2000, supported and authored by Willow Garage (The creators of ROS) and then Itseez who Intel ended up acquiring... The history of OpenCV is tangled, and using it as a newbie can be very daunting. So today we wont build a full OpenCV application but instead will use pipelines to help us filter the picture below.
This seems like a rather silly use of a really powerful software system but it has a real application to me. I'm one of the many people affected with some form of colorblindness. Mine is not total, but Red-Green colorblindness known as Deuteranopia. It is caused by a defect in Green sensitive cones in the eye. 75% of all colorblindness occurrences are of the Deuteranopia types.
How does Colorblindness Affect the Nuggets?
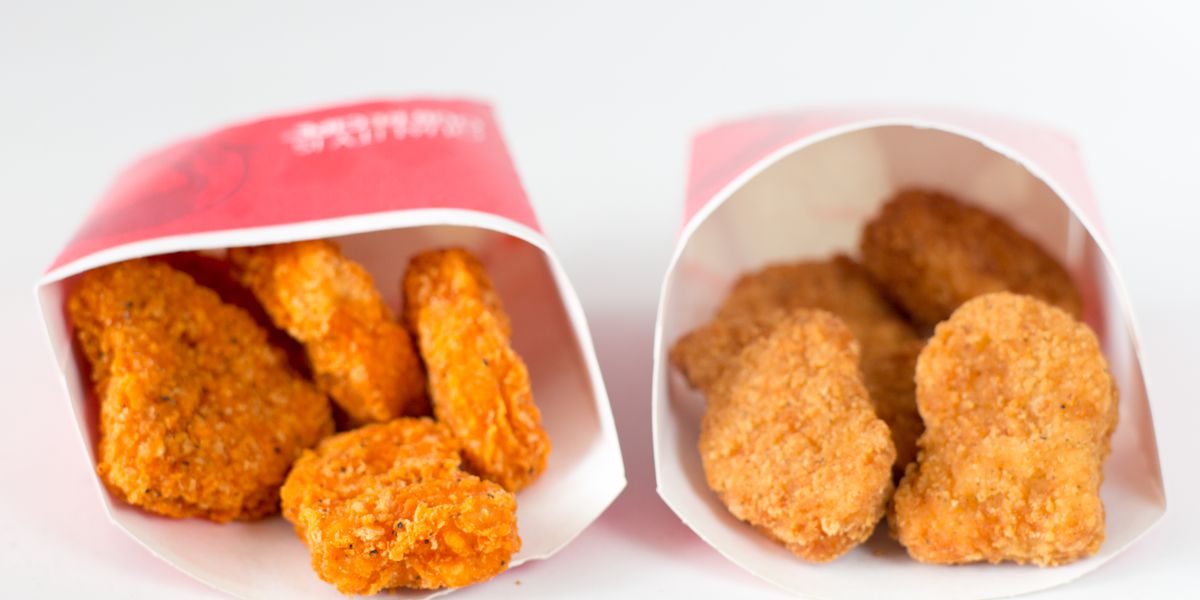
Okay...but what about the nuggies??? Well brown, the "spicy red" and the other hues and shades that make the two types of nuggets different to the eye are a blend of many colors. Colors like Red and Green are muted due to the defect. That means to me the original side-by-side picture looks more like this.
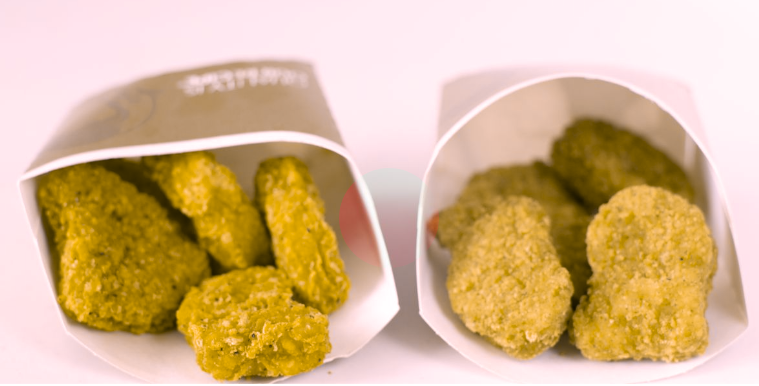
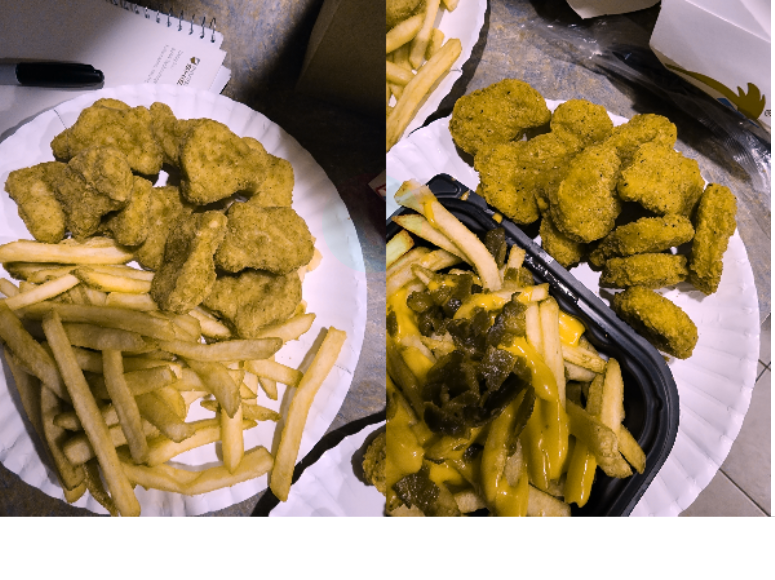
Still not the worst thing, in the stock photo conditions. Yeah we can easily tell with perfect lighting, no other distracting objects and a clean background which is which. So now can you tell with a Deuteranopia filtered photo which type of nugget is on each plate below?
How can OpenCV be used to Aid Colorblind People?
If you can't tell the nuggets apart like me maybe OpenCV can help us fix that defect! While I'm not implying that this is a big issue in my life, it is something that comes up time and time again. My color vision is different so using color as a way to sort isn't always straight forward.
For 5 years part of my S.T.E.M. teaching work involved sorting 1x1 lego bricks for mosaics by color... My personal nightmare! Below is a gif showing some actual examples of ones I built, or helped students build during my time at The Robot Garage as a Lead Instructor.
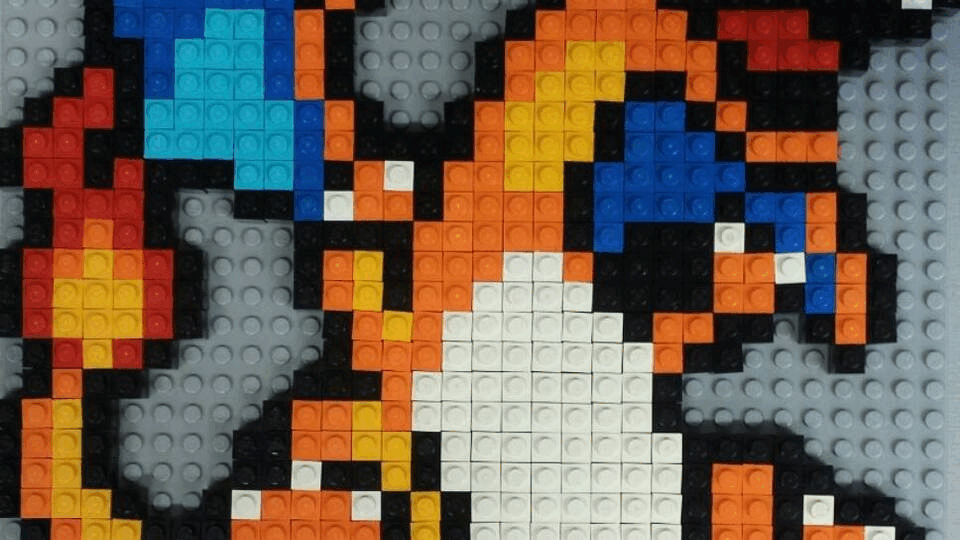
The large Lego Movie one had at least 18 different colors of bricks used. At that time I didn't have Enchroma Glasses or any clue about OpenCV. The best I could manage was finding a RGB color picker app that worked with Google Cardboard. I would wear my Google cardboard headset and use the phones camera to help me sort colors. Instead of sorting by color we will use HSV, contours and more to help us out!
While I'm specifically using the nuggets this methodology of building pipelines with filtering is the heart of computer vision. You can apply this to sorting just about anything or finding specific objects in an image.
People who are already familiar with photography, video editing or photoshop will be at a massive advantage! Ready to start your "vision quest"? Sorry I couldn't help it, but now it's time to get down to how we actually use pipelines.
What are Pipelines in OpenCV?
Pipelines allow us to take a frame from an image and apply filters in a chain one after the other. The resulting image from a filter is "piped" into the next filter and so on. This is powerful as we can have pipelines for all sorts of neat filtering methods. What's even better is you can figure out and test filters in your pipeline with 0 programming needed.
Each filter will have parameters that affect how it does it's job. There are more filters out in existence for OpenCV than I can cover here. They can range from just flipping an image to grayscale to being as complex as determining the direction of lines. You can find blobs, filter by color, hsv and more.
How Can I Learn more About Advanced Pipelines and Creating my Own OpenCV Programs?
I am not an expert in OpenCV, I do NOT claim to be and I don't intend this post to be a comprehensive guide on filtering. There are lots of guides out there on YouTube, Online Education platforms like Udemy, Skillshare and etc. If you are more of the reading type like me then I can highly recommend the free book below.
What Software do I Need to Test my Pipelines?
Thankfully to test OpenCV Pipelines in python theres a FREE and easy open source tool we can use. Michael Gallacher on GitHub released opencv-pipeline which can really speed up your development time with basic filter testing. In order to run this tool you will need the following:
- Python 3.6+ Installed
- opencv-python and kivy Installed
- pip install opencv-python kivy
If you want to learn more about Python I highly recommend CodeCademy's free online course. I used it in my classroom for years whenever I needed to get the basic lessons out of the way. It has self paced, easy to follow modules for each course. You get good practice problems, practical exams and more!
If you are completely new to programming in general I recommend the FREE course Learn Python 2. While Python 2 is technically outdated many of the basics have NOT changed one bit in Python 3. This is a good way to learn the basics of programming that can apply to any language.
If you are NOT new to programming, but new to Python I recommend the FREE course Python for Programmers. This is a more advanced course that skips over many of the basics its assumed programmers know. At only 4 hours long it's one of the fastest ways to learn the quirks of python in a hurry!
Setting Up your First Pipeline
If you download my github repository from https://github.com/mrSiefen/OpenCVNuggets as a .zip or via the git command, you will get everything including my test images. If you are planning to use a different image then you should download the original repository from Michael's github.
Open the extracted/cloned folder and examine the contents. The main files we need to find are "test_pipeline.json" and "pipeline_usage.json". The first file is our custom pipeline the program will use on our specified image. The second file is an example pipeline featuring many of the filters we can and will use and many many more.
Open the "test_pipeline.json" file in any text editor like notepad, notepad++, vim, vsCode, whatever your choice! If you grabbed my repo it should be populated with some default filters for GaussianBlur, HSV and Contours. If you grabbed Michael's repo it will have a much larger set of filters. You can remove these and replace them with the filters below for a default configuration.
[
    {
        "filter": "GaussianBlurFilter",
        "enabled": false,
        "params": {
        "size": 1
        }
    },
    {
        "filter": "HSVFilter",
        "enabled": false,
        "params": {
        "h-lo": 0,
        "h-hi": 180,
        "s-lo": 0,
        "s-hi": 255,
        "v-lo": 0,
        "v-hi": 255
        }
    },
    {
        "filter": "ContoursFilter",
        "enabled": false,
        "params": {
        "lower": 0,
        "upper": 99999
        }
    }
]
Now save that file and open up a command prompt, powershell or terminal inside of the opencv-pipeline folder. Per Michael's instructions we can start the program by running the following command:
python3 main.py
You can specify the image path manually with an argument like so:
python3 main.py -i .\nuggetSBS.jpg
You can also specify the pipeline manually with an argument like so:
python3 main.py -p .\test_pipeline.json
Or you can specify both like so:
python3 main.py -p .\test_pipeline.json -i .\nuggetSBS.jpg
Finding the Spicy Nuggets
When the program first opens you will see two panes. On the left is the original image we selected as our source. On the right is the end result of our pipeline of filters. By default by test_pipeline.json file is set to min/max and disabled for all filters. Turn them on one at a time and see what happens as you adjust each one.
GaussianBlur helps remove small issues in our image. By blurring the image before running calculations we get better results with less variations from pixel to pixel.
The HSVFilter uses minimum and maximum thresholds for Hue, Saturation and Value. HSV and HSL are alternatives to RGB.
Finally the contours filter helps us by eliminating blobs in the image that don't fall between our min and max values. Contours means curves, and if a blobs number of contours is less than a certain amount it helps us eliminate it as a valid result. So now how do we combine them all in a pipeline in order?
The SEMI_PSEUDO_CODE:
- Import the image
- Apply a GaussianBlurFilter
- Apply a HSVFilter
- Apply a ContoursFilter
- View the output
Finding Spicy Nuggets Pipeline:
[
    {
        "filter": "GaussianBlurFilter",
        "enabled": true,
        "params": {
        "size": 15
        }
    },
    {
        "filter": "HSVFilter",
        "enabled": true,
        "params": {
        "h-lo": 10,
        "h-hi": 22,
        "s-lo": 181,
        "s-hi": 255,
        "v-lo": 178,
        "v-hi": 255
        }
    },
    {
        "filter": "ContoursFilter",
        "enabled": true,
        "params": {
        "lower": 38900,
        "upper": 68900
        }
    }
]
Finding the Regular Nuggets
The regular nuggets pipeline is almost identical to the spicy nuggets pipeline. We need to change our HSV since the colors of our nuggets are different. We also change our contour values if the blob sizes between our nugget blobs are very different from each other.
The SEMI_PSEUDO_CODE:
- Import the image
- Apply a GaussianBlurFilter
- Apply a HSVFilter
- Apply a ContoursFilter
- View the output
Finding Regular Nuggets Pipeline:
[
    {
        "filter": "GaussianBlurFilter",
        "enabled": true,
        "params": {
        "size": 15
        }
    },
    {
        "filter": "HSVFilter",
        "enabled": true,
        "params": {
        "h-lo": 14,
        "h-hi": 22,
        "s-lo": 100,
        "s-hi": 231,
        "v-lo": 153,
        "v-hi": 255
        }
    },
    {
        "filter": "ContoursFilter",
        "enabled": true,
        "params": {
        "lower": 31250,
        "upper": 55150
        }
    }
]
Does it Work on the IRL Image?
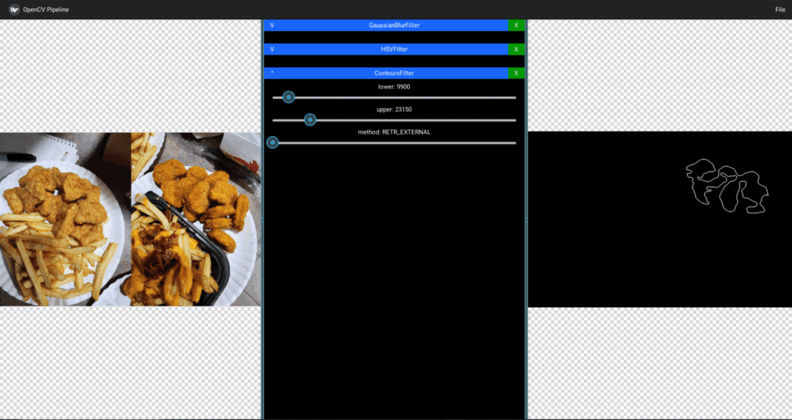
Yes, with 2 minor tweaks for finding the spicy nuggets! The changes needed have to do with the contour filter. Since we used contour as our final sorting criteria and our image is different our visible contours have changed. But our HSV filter is still perfect! Below is the tweaking I needed to find the Spicy Nuggets in my IRL side-by-side image. You only need to change the contour lower and upper values from the last spicy nuggets pipeline.
{
    "filter": "ContoursFilter",
    "enabled": true,
    "params": {
    "lower": 9900,
    "upper": 23150
    }
}
What's Next?
Now that we know how to adjust basic filters what else can we do? You can add more filters by editing your pipeline files. You can try running the same filter on images with different lighting conditions to see how the process is affected.
If you want to apply these ideas to FTC robots id recommend the EasyOpenCV simulation tool for FTC. You can learn more about FTC Robots in my previous blog post or read any of my other blog posts. See you next time in part 2 to learn more about OpenCV!